If you experience any difficulty in accessing content on our website, please contact us at 1-866-333-8917 or email us at support@chicagovps.net and we will make every effort to assist you.

Ready to setup your own IRC server on Ubuntu? IRC is better known as Internet Relay Chat and it is an old school method of creating and hosting your own chat room.
Using the InspIRCd app on a low end VPS, you can begin hosting your own IRC chat rooms to instantly communicate with your family and friends. To get started, go ahead and spin up an Ubuntu 16.04 VPS and login using SSH.
Once you follow these steps, you’ll be able to configure and deploy your own IRC server.
> sudo apt-get update
> sudo apt-get install inspircd
If you are asked to answer Y or N, always select Y unless otherwise noted in this tutorial. If all went well, you’ll be returned back to the command line without any errors. Here is an example:

The easiest way to configure InspIRCd is by using the Nano text editor. Here is how you should proceed:
> sudo nano /etc/inspircd/inspircd.conf
There are a few entries you’ll need to change on this configuration page. Examine the following values:
Where it says server name=, this doesn’t have to be a registered domain name, it can be whatever you want. For description and network, these can be unique value that are defined by your personal preferences. For ID, use any value that has 2 digits and 1 letter.
<server name=”lowedtest1.ircchat.local”
description=”Local IRC Server”
Id=”12b”
network=”testIRC”>
In the admin details, use values that meet your personal preferences. Here’s our changes:
<admin name=”LowEndBox”
nick=”Testguy”
email=”lowendbox@lowendbox.com”>
Scroll down some more and you’ll find these settings that need to be changed. For the bind address, let’s just leave this blank for now.
<bind address=”” port=”6667″ type=”clients”>
Now we have to setup operator passwords to shutdown or restart the IRC service. We’ll use lowendtest and lowendtest2 as a placeholder password but you can use whatever you like.
<power diepass=”lowendtest” restartpass=”lowendtest2″ pause=”2″>
You can setup multiple accounts if you’d like; just copy and paste the following code into nano for each unique operator account that you’d like to create.
The default value is oper name=”root” – Let’s change that.
We’ll also add the public IP address of your VPS in the host settings. Replace XXX.XXX.XXX.XXX with your server’s IP. Also replace server_hostname_goes_here with your VPS’s hostname. This is usually assigned by your VPS provider.
In our example, the actual hostname for the VPS is called “lowendtest1”
<oper name=”lowendoperator”
password=”lowendtest”
host=”*@localhost, *@xxx.xxx.xxx.xxx, *@server_hostname_goes_here”
type=”NetAdmin”>
As mentioned above, you can copy and paste this to setup new operators on your IRC channel.
Hit CTRL+O, hit Enter, hit CTRL+X
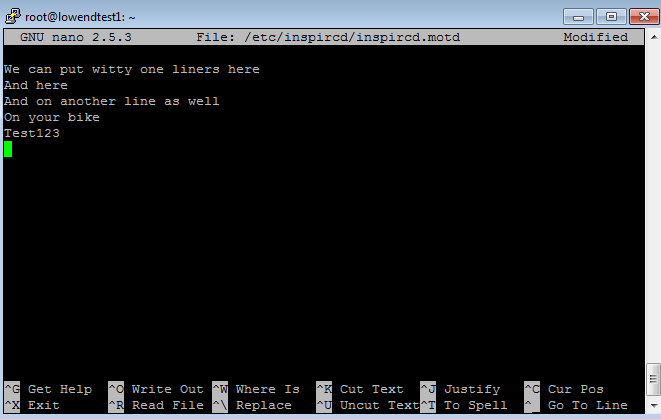
Using Nano, we can also edit the Message of the Day banner. Here’s the command to open up this file:
> sudo nano /etc/inspircd/inspircd.motd
In the chat room, users can type /motd and get the current message of the day. Here is some test text that we added to our demo:

If you want to edit the rules, you can use this command line to edit with Nano.
> sudo nano /etc/inspircd/inspircd.rules
With the above configuration, you should be able to access your new IRC server. Before we try to connect, let’s ensure that inspircd is up an running.
> sudo service inspircd start
Let’s use an old school solution to connect to IRC. Let’s use the mIRC app (Shareware). Any IRC app will work but mIRC is a popular solution that can be downloaded from here: http://www.mirc.com/get.html
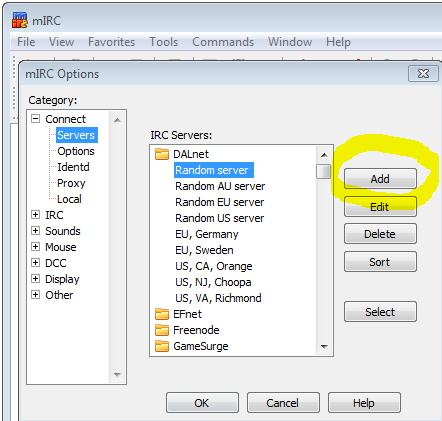
Once you’ve installed mIRC on your PC, you can click:
File > Select Server > Add

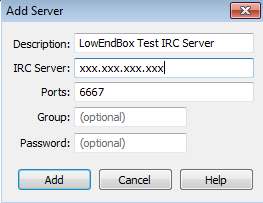
Fill out the necessary info with data that references your VPS:

Click Add
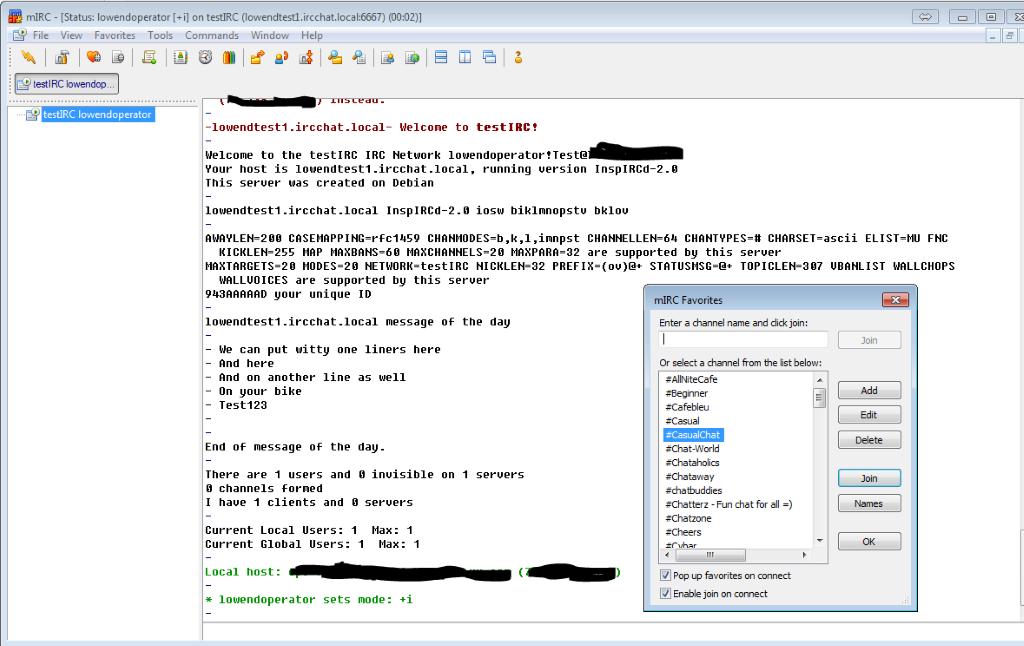
Click the Lightening Bolt Icon in the top left hand corner of mIRC. It may ask you which server you want to connect to – Find the server description you just added in your list of IRC servers.
Presto! You’re connected!
From here, you can select a chat room and invite your friends to join you on IRC for all the fun.

Note: You won’t see the black redactions on your screen, this is just to sanitize the author’s data.
